Blogs

How to Weld 304 Stainless Steel in 2026?

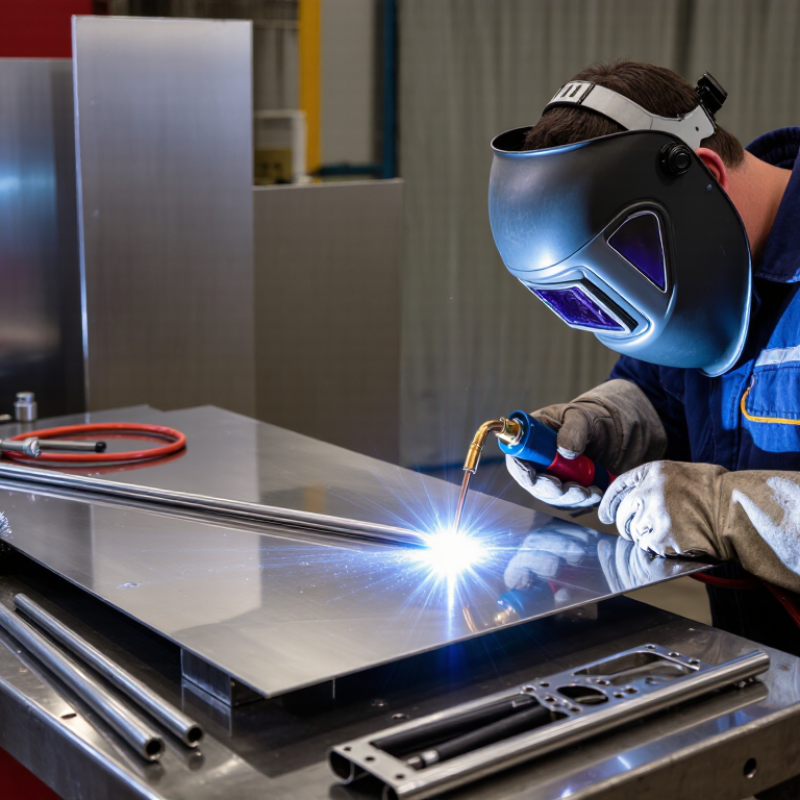
Welding 304 Stainless Steel looks straightforward, yet small errors can weaken an otherwise clean joint. This austenitic grade contains chromium and nickel, giving it strong corrosion resistance and good formability. However, excessive heat, poor shielding, or carbon-steel contamination can produce discoloration, distortion, and reduced corrosion performance. The finished bead may look attractive. It can still be metallurgically poor.

John C. Lippold, a recognized welding metallurgist and author of Welding Metallurgy and Weldability of Stainless Steels, offers a useful warning: “Weldability is not simply a material property; it is a process property.” That principle guides this 2026 overview. A sound procedure considers joint design, tungsten cleanliness, shielding-gas coverage, arc length, travel speed, and interpass temperature. It also considers what happens after welding, especially cleaning and passivation.

In practical work, I have seen a bright weld fail because a wire brush had previously touched mild steel. A short back-purge can matter more than a polished appearance. Argon flow must protect the weld pool without creating turbulence. Heat input should remain controlled, particularly on thin sheet. No procedure is perfect. That deserves honest attention.

This guide explains how to prepare, fit, weld, inspect, and finish 304 stainless steel responsibly. It discusses TIG, MIG, and selected shop practices, while recognizing that equipment, thickness, position, and service conditions change the result. Use qualified procedures, suitable filler metal, and current technical standards. Record the details. Repeatability matters more than a lucky first pass.

How to Weld 304 Stainless Steel in 2026?

304 Stainless Steel: Properties That Shape the Welding Process

How to Weld 304 Stainless Steel in 2026?

304 stainless steel is an austenitic alloy with strong corrosion resistance and good weldability. Its low carbon content reduces the risk of carbide precipitation near welds. However, 304 expands more than carbon steel during heating. Distortion can appear quickly, especially on thin sheet. Its lower thermal conductivity also concentrates heat around the weld area.

Use clean tools reserved for stainless steel. Carbon-steel dust can leave rust marks later. Remove oil, oxide, and moisture before welding. A stable argon-based shield protects the molten pool from atmospheric contamination. Keep the arc short and control heat input carefully. Excessive heat may produce wide beads, discoloration, and unnecessary distortion. Back-purging helps protect the root on tubing and full-penetration joints.

Tips: Tack frequently and use balanced weld sequences. Let the joint cool naturally. Do not quench it with water. Watch the color. Dark blue or gray heat tint signals that cleaning may be needed. I have found that fit-up often matters more than increasing amperage. A small root gap can improve penetration, but an uneven gap creates surprises. This is where practice can expose weak assumptions. Check the finished weld for undercut, pores, cracks, and incomplete fusion before service. Settings should always match thickness, joint design, welding process, and applicable procedure requirements.

How to Weld 304 Stainless Steel in 2026?

304 Stainless Steel: Temperature Ranges That Shape the Welding Process

304 stainless steel melts at approximately 1,400–1,450°C, while prolonged exposure between about 450–850°C can promote sensitization and intergranular corrosion. Keeping the interpass temperature at or below approximately 150°C helps limit heat accumulation, distortion, and unwanted microstructural changes. Actual welding parameters should follow the qualified WPS and material requirements.

Tools, Filler Metals, and Joint Preparation for 304 Stainless Steel

How to Weld 304 Stainless Steel in 2026?

Reliable 304 stainless steel welding starts with clean, controlled preparation. Use a DC TIG power source for precise work, or a DCEP MIG setup for faster fabrication. TIG requires a sharp tungsten, pure argon, and a stable gas flow. MIG commonly uses 308L stainless wire with an argon-rich shielding mixture. Keep separate stainless brushes, files, and abrasives for this job. Carbon-steel dust can cause rust spots later.

Joint preparation affects the weld more than many beginners expect. Degrease both surfaces, remove oxide, and leave a consistent root gap. Thin sheet may need square edges, while thicker plate usually needs a controlled bevel. Clamp the joint firmly, but allow slight movement from thermal expansion. For full-penetration joints, back purging with argon protects the inside root. It prevents dark, rough oxidation. That detail is easy to miss.

Use short welds and moderate heat to limit distortion and discoloration. Excessive heat can reduce corrosion resistance near the weld. I often clean between passes and inspect the bead under bright light. A smooth bead is useful, but appearance alone proves little. Check penetration, undercut, cracks, and trapped contamination. My first settings are rarely perfect. I adjust travel speed, amperage, and gas coverage after observing the puddle. Record successful settings for thickness, position, and joint design. Qualified procedures remain important for pressure, structural, or safety-critical work.

Step-by-Step TIG, MIG, and Stick Welding Procedures

How to Weld 304 Stainless Steel in 2026?

Step-by-Step TIG, MIG, and Stick Welding Procedures

Clean 304 stainless steel thoroughly before welding. Remove oil, oxide, and fingerprints with a dedicated stainless brush. Use separate tools to prevent carbon contamination. Wear proper eye, hand, and respiratory protection.

Set TIG welding to direct current electrode negative, with pure argon shielding gas. Start around 15–20 liters per minute, then adjust for drafts. Keep the tungsten close, and add compatible stainless filler steadily. A gas back purge protects the inside of pipes and tubes. Watch the color. Straw is usually acceptable; dark gray suggests excessive heat or poor shielding.

For MIG welding, use stainless wire and a suitable argon-rich gas mixture. Set electrode positive polarity, then tune voltage and wire speed on scrap material. Keep the gun angle consistent and use short, controlled movements. Clean each stop carefully. Do not rush the travel speed. A wide, bluish bead often shows too much heat.

My first pass is not always perfect, especially on thin sheet. That mistake still teaches me to reduce heat input and improve fit-up.

Stick welding can work in outdoor repairs where gas shielding is difficult. Select a low-carbon stainless electrode designed for 304 applications. Follow its polarity and amperage range. Keep the arc short, remove slag between passes, and store electrodes correctly.

Stainless conducts heat poorly, so moderate interpass temperatures matter. Let the joint cool naturally. Never quench it with water. Inspect the bead for cracks, porosity, undercut, and trapped slag before service.

Heat Control, Shielding Gas, and Distortion Management

How to Weld 304 Stainless Steel in 2026?

Welding 304 stainless steel starts with disciplined heat control. Clean the joint with a dedicated stainless steel brush and solvent. Keep the arc short and use the lowest stable amperage. Excess heat can enlarge the heat-affected zone and increase distortion. For TIG work, moderate travel speed usually produces a narrow, controlled bead. Allow brief cooling pauses between welds. Do not let the interpass temperature rise unnecessarily. A temperature pencil or contact thermometer helps, although many welders rely too much on visual judgment.

Shielding gas protects the molten pool from oxygen and nitrogen. Use high-purity argon for TIG welding, with flow adjusted to the torch, cup, and workshop airflow. Excessive flow may create turbulence. That mistake is common.

For MIG welding, an argon-rich mixture with limited carbon dioxide can reduce oxidation and spatter. Protect the root with a back purge when full penetration matters. Keep hoses leak-free, and avoid fans near the weld zone. Even a small draft can cause gray discoloration and porous edges.

Distortion management begins before striking an arc. Use close, even fit-up and short tack welds placed symmetrically. Weld in alternating sections instead of running one long bead continuously. Copper or aluminum backing can absorb heat and support the joint. Clamps help, but excessive restraint may create hidden stress. I have seen attractive welds move after unclamping because the sequence was poorly planned. Record amperage, travel speed, gas flow, and material thickness for each job. That record exposes habits that eyesight misses.

Common Weld Defects, Post-Weld Cleaning, and Quality Inspection

How to Weld 304 Stainless Steel in 2026?

Welding 304 stainless steel demands tight control of heat and shielding gas. Excessive heat can cause distortion, oxidation, and reduced corrosion resistance. Common defects include lack of fusion, porosity, undercut, cracks, and dark internal oxidation, often called sugaring. Keep the arc stable and protect the root with clean argon. A small mistake inside the joint can become a costly failure.

ISO 5817:2023 defines three weld quality levels: B, C, and D. Level B is the strictest. Inspectors should select the level before welding, not after defects appear. Visual inspection should check bead shape, undercut, spatter, discoloration, and joint alignment. Dye penetrant testing can reveal surface-breaking cracks. Radiographic or ultrasonic testing may be needed for critical sections. Inspection records should include welder identification, heat input, shielding gas, and repair history.

Post-weld cleaning is not cosmetic. It removes heat tint, embedded iron, and surface contamination. ASTM A380/A380M provides cleaning and descaling guidance, while ASTM A967/A967M-22 identifies verification methods, including water immersion, humidity, salt spray, copper sulfate, and electrochemical testing. Use dedicated stainless tools. Never assume a bright surface is passive. Chemical cleaning can also introduce risks when poorly controlled. Frankly, many workshops inspect the weld but neglect the surrounding heat-affected area. That is a weakness worth correcting. A clean-looking joint may still fail a corrosion test.

How to Weld 304 Stainless Steel in 2026? - Common Weld Defects, Post-Weld Cleaning, and Quality Inspection
Process Stage Control Dimension Recommended Data or Range Quality Control and Inspection Method Technical Purpose
1. Material Preparation and Welding Setup
Material identification Base material Austenitic stainless steel 304 or 304L; verify the material certificate and heat number before welding. Confirm grade, thickness, surface condition, and traceability. Keep carbon-steel tools and grinding dust away from the stainless-steel work area. Prevents wrong-material fabrication and embedded ferrous contamination that can cause surface rust.
Joint preparation Fit-up and joint cleanliness Remove oil, paint, moisture, oxide, and adhesive residue. For butt joints, use a consistent root gap and avoid excessive mismatch. Check with a calibrated ruler, feeler gauge, or welding fit-up gauge. Degrease with a residue-free solvent and allow the joint to dry fully. Reduces porosity, lack of fusion, inclusions, and unstable arc behavior.
Heat control Preheat and interpass temperature Preheat is normally not required for clean 304/304L. Keep the interpass temperature typically below 150 °C unless the approved welding procedure specifies otherwise. Measure with temperature-indicating crayons, contact thermometers, or calibrated infrared equipment. Record the maximum interpass temperature. Limits distortion, excessive oxidation, and unnecessary heat exposure.
Shielding gas Gas type and flow GTAW: high-purity argon, commonly 8–12 L/min. GMAW: argon-rich stainless-steel shielding gas, commonly 12–20 L/min. Adjust for torch, nozzle, and local drafts. Check regulator, hoses, connections, gas purity, and flow at the torch. Protect the weld area from wind and strong air movement. Maintains an oxygen-free arc zone and reduces porosity and heat tint.
Filler selection Filler metal Use a filler compatible with the approved welding procedure, commonly ER308L for 304/304L joints. Use a low-carbon grade when corrosion resistance and sensitization control are important. Verify filler classification, diameter, batch identification, and storage condition before use. Supports corrosion resistance and suitable weld-metal chemistry.
Welding technique Arc and travel control Use a short, stable arc; avoid excessive weaving; maintain consistent travel speed and torch angle. Deposit stringer beads where practical. Monitor voltage, current, wire-feed speed, travel speed, polarity, and shielding-gas coverage against the qualified welding procedure. Controls penetration, bead shape, distortion, and total heat input.
2. Common Weld Defects in 304 Stainless Steel
Defect prevention Porosity Typical causes: moisture, oil, leaks, insufficient shielding gas, excessive gas flow, drafts, or contaminated filler metal. Perform visual inspection and use radiographic or ultrasonic testing when required by the project specification. Repair only under an approved procedure. Gas cavities reduce weld soundness and may create leakage paths.
Defect prevention Lack of fusion or incomplete penetration Typical causes: low heat input, excessive travel speed, poor joint preparation, incorrect torch angle, or inadequate root access. Inspect bead profile and root condition. Use penetrant, radiographic, or ultrasonic testing according to joint design and governing code. Unfused regions reduce structural continuity and may retain corrosive contaminants.
Defect prevention Crater cracking Fill the crater before extinguishing the arc; use a controlled downslope or backstep technique where suitable. Visually inspect weld stops and starts. Use penetrant testing when surface-breaking cracking must be ruled out. Weld craters can shrink and crack if they are left unfilled.
Defect prevention Excessive heat tint Dark blue, purple, or black oxidation indicates inadequate shielding or excessive heat exposure. Minimize heat input and provide back purging for open-root joints when required. Inspect both weld and heat-affected surfaces. Do not use color alone as the acceptance criterion; apply the project specification. Heavy oxidation can reduce the corrosion performance of the stainless-steel surface.
Defect prevention Tungsten or metallic inclusions Avoid touching the tungsten electrode to the weld pool. Remove contaminated tungsten, regrind it, and maintain correct electrode extension. Use visual inspection and radiographic testing where internal inclusions are critical. Inclusions interrupt weld continuity and may become corrosion initiation sites.
3. Post-Weld Cleaning and Surface Restoration
Initial cleaning Slag, spatter, and residue removal Remove spatter and residues using dedicated stainless-steel brushes, non-contaminating abrasives, or approved mechanical methods. Tools used on carbon steel must not be reused on stainless steel. Clean until no visible residue remains. Prevents iron contamination, staining, and localized corrosion.
Chemical cleaning Pickling or passivation Use a qualified commercial process selected for the weld condition and surface finish. Pickling products may contain hazardous acids, including hydrofluoric acid, and require strict safety controls. Follow the chemical supplier's safety data sheet, contact time, temperature, ventilation, PPE, neutralization, and waste-disposal requirements. Removes heat tint and restores a cleaner chromium-rich surface.
Rinsing and drying Final surface condition Rinse thoroughly with clean water after chemical treatment and dry without leaving chloride-rich or acidic residues. Inspect under suitable lighting for remaining discoloration, etching, residue, water marks, or embedded particles. Residual chemicals can cause staining and premature localized corrosion.
4. Quality Inspection and Acceptance Records
Visual testing (VT) Surface and profile Check weld size, continuity, profile, undercut, overlap, arc strikes, cracks, visible porosity, spatter, and surface contamination. Use adequate lighting and calibrated gauges. Acceptance limits must come from the applicable drawing, welding code, or project specification. Detects many surface defects before additional testing or service.
Liquid penetrant testing (PT) Surface-breaking discontinuities Suitable for non-porous stainless-steel surfaces after cleaning and drying. Apply penetrant, dwell, remove, apply developer, and interpret indications according to the written procedure. Use qualified personnel, controlled dwell times, and documented inspection results. Cracks and relevant linear indications are generally unacceptable unless the governing specification states otherwise. Finds surface-breaking cracks, laps, and porosity not reliably visible to the eye.
Radiographic or ultrasonic testing Internal weld integrity Select RT or UT when internal fusion, penetration, or volumetric quality is critical and the joint geometry is suitable for the method. Apply the examination extent and acceptance criteria specified by the governing code or contract documents. Evaluates internal discontinuities that cannot be confirmed by visual inspection alone.
Dimensional inspection Distortion and alignment Measure final dimensions, flatness, squareness, joint alignment, and weld size against the approved drawing and tolerance requirements. Use calibrated measuring equipment and record results before final release. Confirms that welding has not moved the assembly outside functional tolerances.
Documentation Traceability and release Retain the approved welding procedure, welder qualification, material certificates, filler records, inspection reports, repair records, and cleaning details. Review records for completeness, inspector authorization, equipment calibration, and closure of nonconformities. Provides objective evidence that fabrication and inspection requirements were followed.
Important: Numerical ranges are practical starting points for procedure development, not universal acceptance limits. Final welding parameters, inspection methods, and defect acceptance criteria must follow the qualified welding procedure, approved drawings, applicable code, and site safety requirements.

Plug & Play Installation

Our installation services are top-notch, delivering modular systems for any application on time in plug & play condition. We leave nothing for you to figure out, set up, or fix. All you’ve to do is just step in, and get going with your business.

Dismantling & Reassembling

We hold a long-term view when we build modular rooms taking into consideration your changing needs. Whether it’s shifting your workspace to a new site, redesigning your unit to fit new requirements, or simply clearing the area at the end of the project, our Dismantling & Reassembling teams are pressed into service to get the job done in the quickest possible time and minimum resource wastage.

Interior Designing

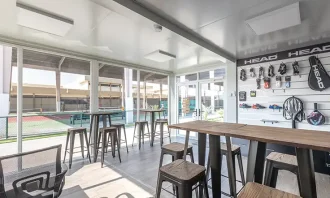
Our interior designs combine both functional and aesthetic aspects to provide you with physical and emotional comfort. We ask you for your preferences and give the best possible solutions aligned to your tastes. Our units are built to be modern, stylish, and elegant.

Bespoke Solutions

We understand that every project is unique and therefore has a different set of requirements. That’s why we believe in customizing our solutions to fit individual needs. We are equipped with the right talents, technology, and skillset to offer bespoke modular units, without compromising on turnaround time or quality.

Aftersales Service

The benefits of choosing Containers ME continues long after the installation of the units as we provide aftersales service for as long as you need. All you have to do is sign the Annual Maintenance Contract (AMC) and enjoy technical support for all the maintenance-related issues. By signing the contract, you can rest assured that a highly professional team of dedicated staff are at your service all year round to attend to your needs.

Customized Container Solutions

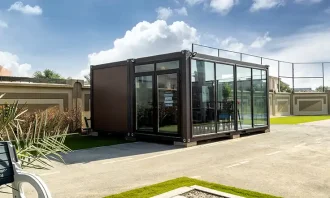
We specialize in Customized Container Solutions designed to meet diverse needs across the UAE. Our offerings include customized modular containers that cater to various applications, from tailor-made container solutions to bespoke container designs.

Whether you’re looking for personalized container homes or custom modular containers, we have you covered. Our customized container offices provide functional workspaces, while our customized portable containers ensure flexibility on-site. Explore our range of custom container storage units and customized cargo containers to optimize your space.

We also offer custom container leasing and custom container fabrication services, along with customized sea containers designed for secure transport. For specialized needs, our specialized container modifications will help you create the perfect solution for your requirements in both Dubai and the broader UAE.

Get a quote

Get a quote